Creating an onboarding flow in the coach app is a great way to efficiently set up new client accounts with all the necessary components for their fitness journey. This guide will walk you through the steps to create and customize your own onboarding flow.
Step 1: Navigate to the Onboarding page
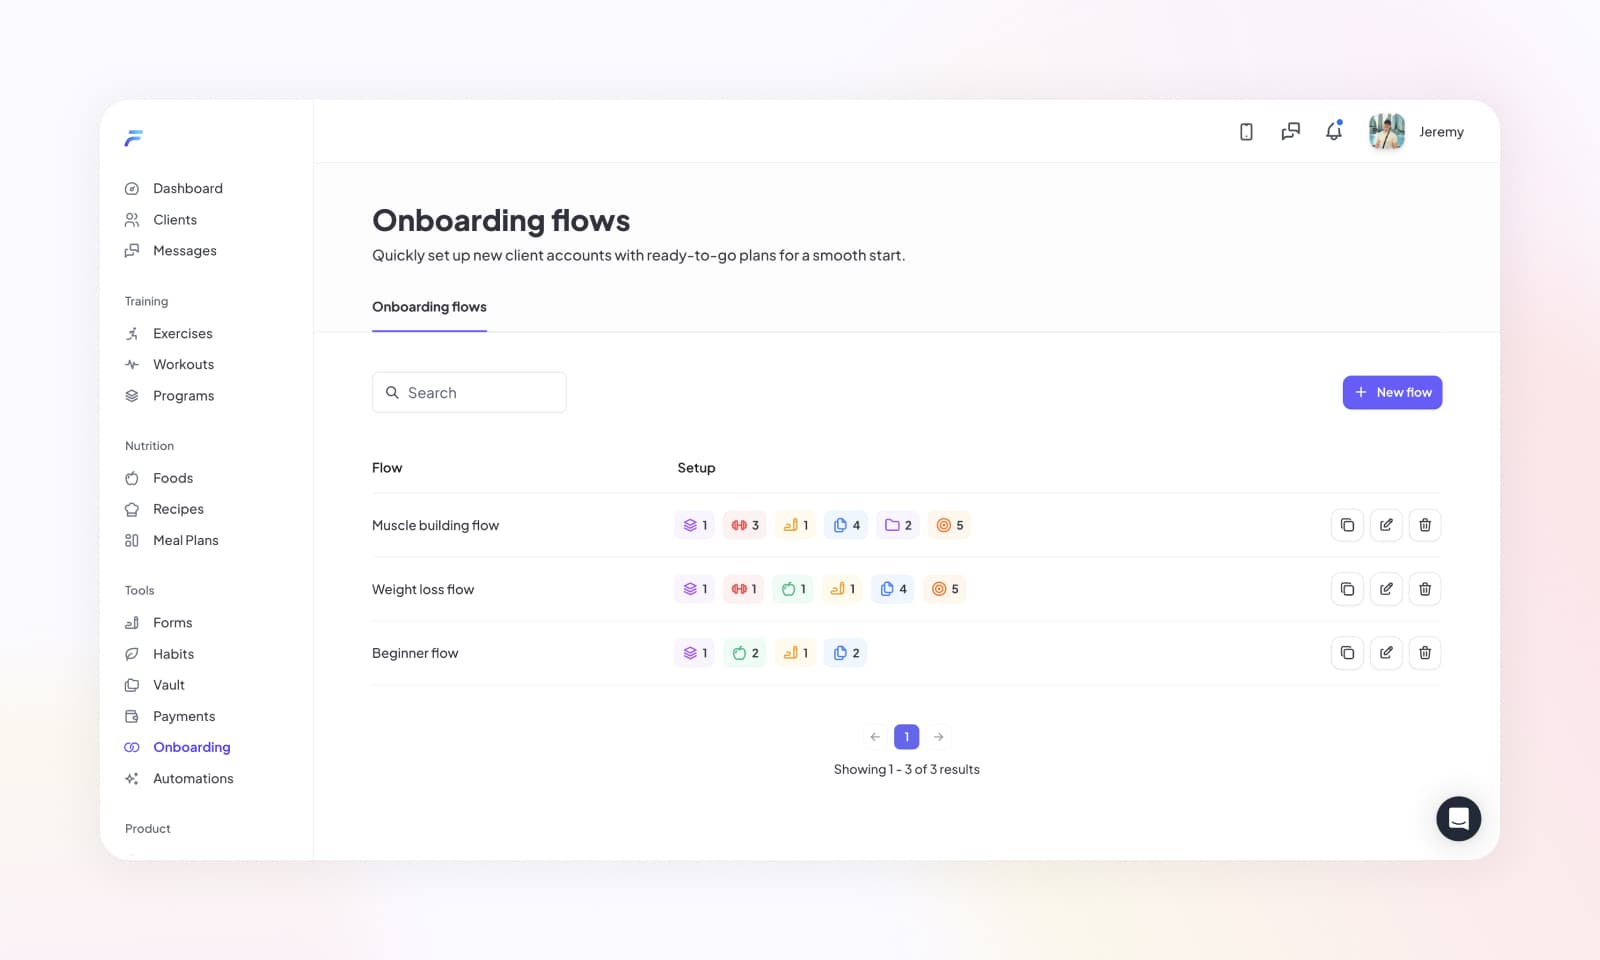
Start by heading to the Onboarding tab/page within the coach app. Here, you'll see a list of all your existing onboarding flows. Each flow contains:
- Flow Name: The name you've given to that specific onboarding process.
- Setup: Details of all the components included in the flow (workout programs, collections, nutrition plans, check-in forms, vault resources, and habits).

Step 2: Create a new onboarding flow
To create a new onboarding flow, click the Add New Flow button. You'll be prompted to give your flow a name.
Once you've named your flow, you can begin adding the various components that will be automatically assigned to new clients.
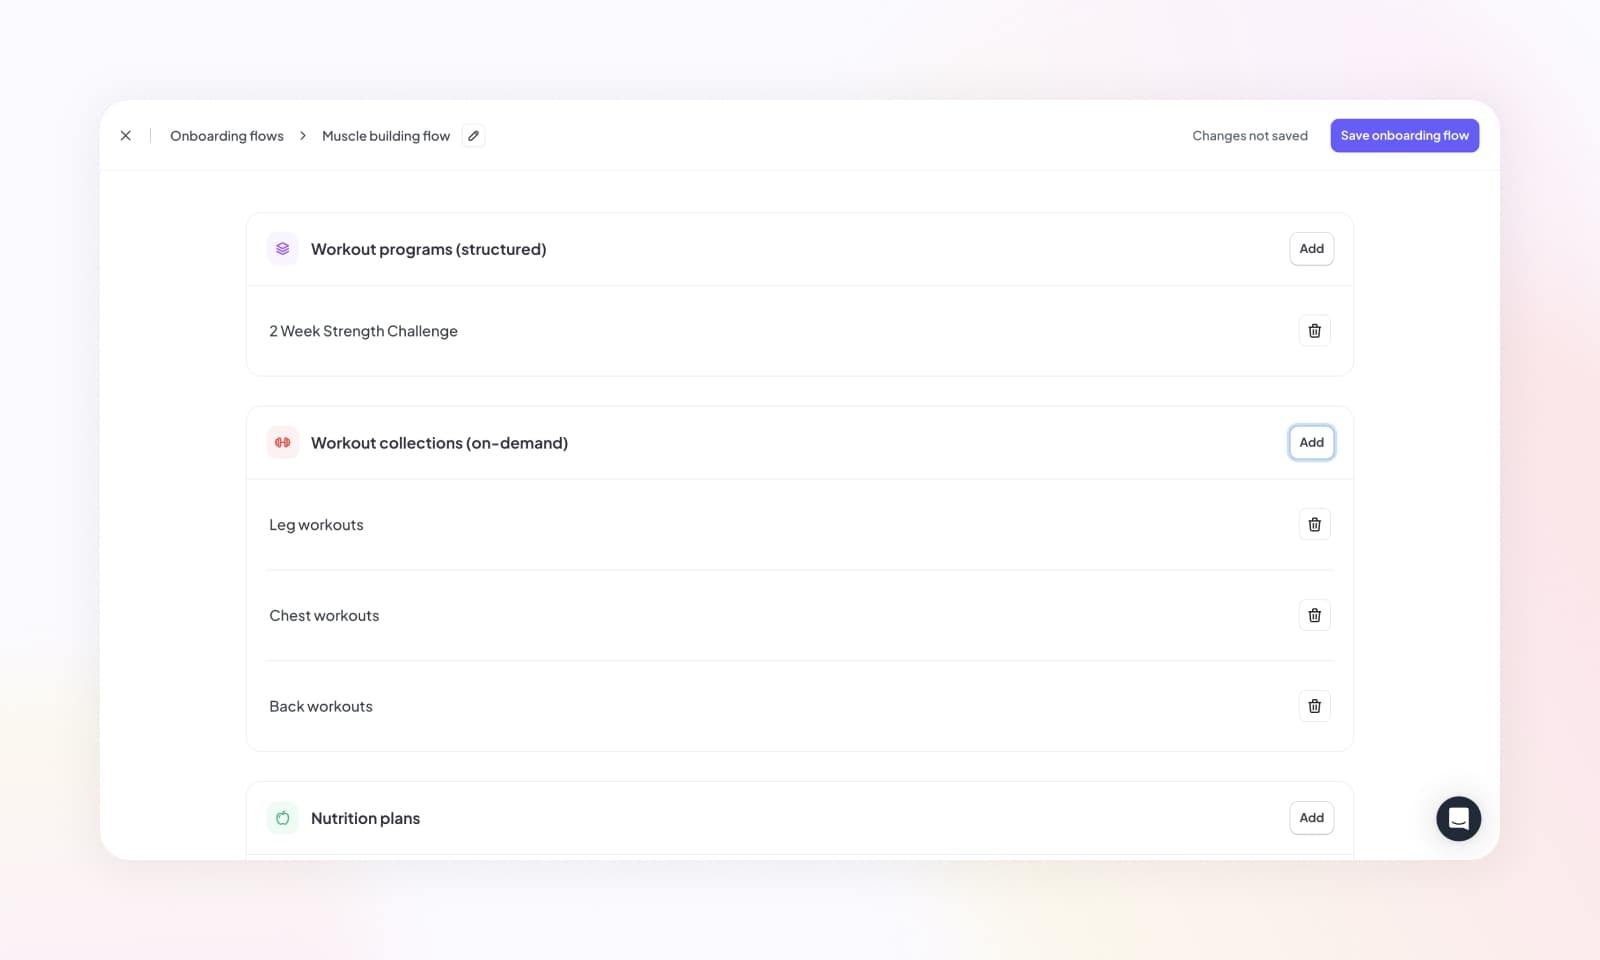
Step 3: Build out your onboarding flow
Next, select the components you want to include in your onboarding flow:
- Workout Programs (Structured): Add pre-scheduled training programs that will appear in the client's training calendar on specific days.
- Workout Collections (On-Demand): Include flexible workout collections that clients can complete any day they choose.
- Nutrition Plans: Choose meal plans and macro targets that suit your client's goals.
- Check-in Forms: Select regular progress tracking forms for clients to complete.
- Vault Resources: Add individual educational materials, guides, or resources.
- Vault Collections: Include organized sets of resources grouped by topic.
- Habits: Set up daily habit tracking items for lifestyle changes and accountability.

You can add multiple components for each category, tailoring the onboarding process to the client's needs.
After adding all the necessary components, click Save to finalize your onboarding flow. Your new flow will now appear in the onboarding list, ready to be assigned when you create a new client account.
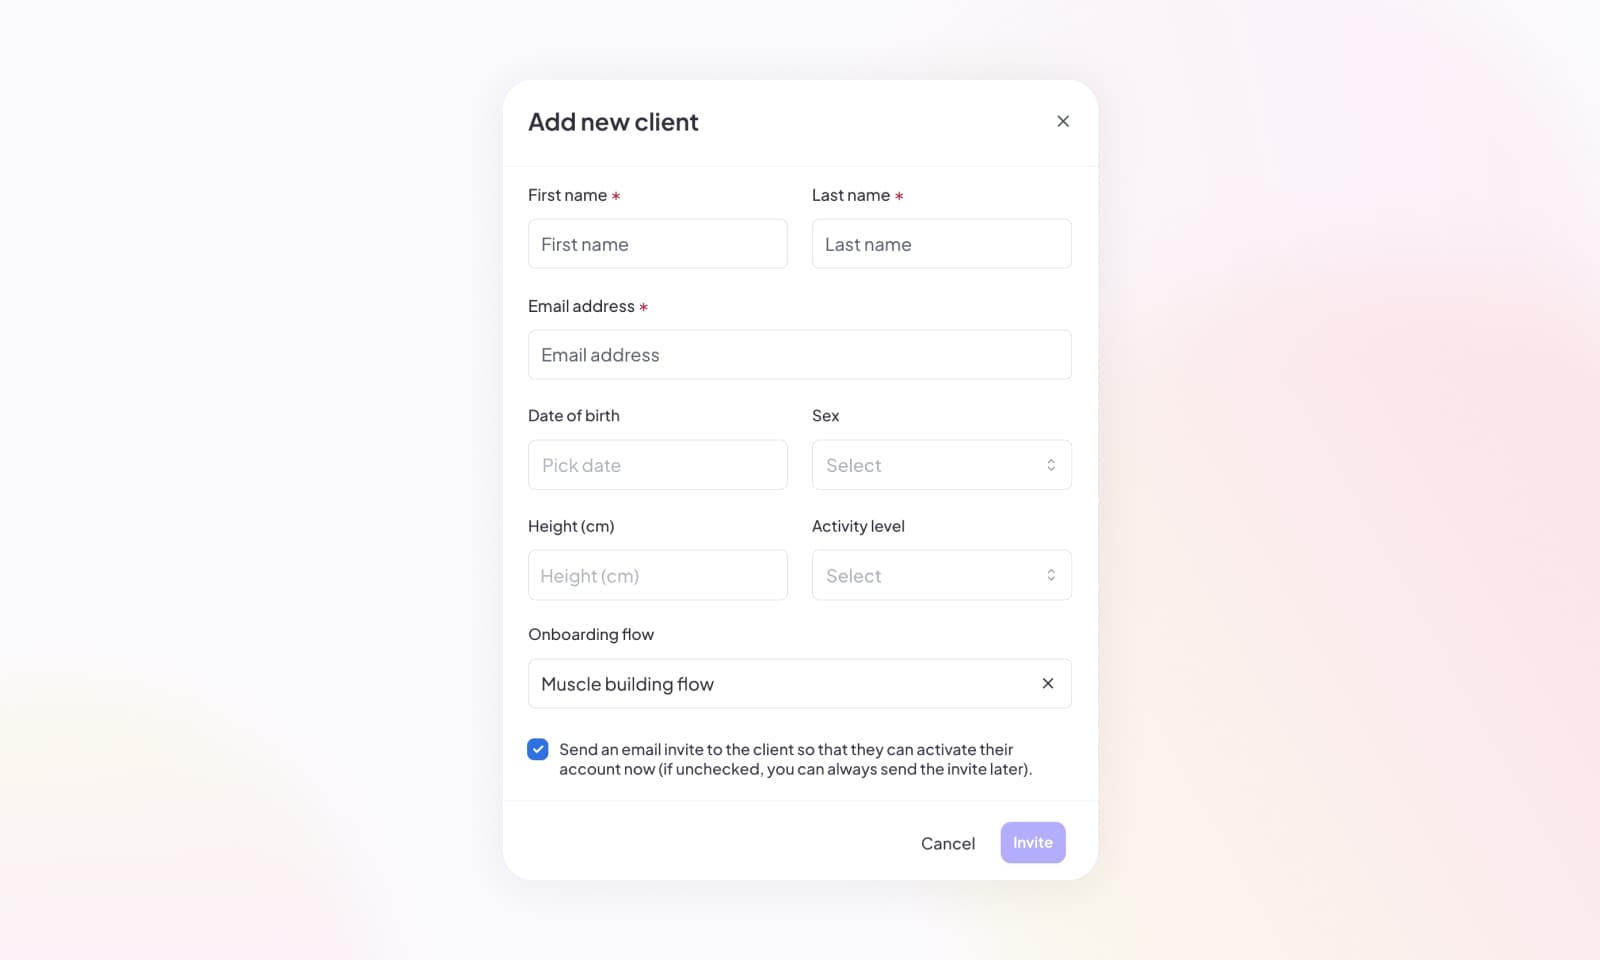
Step 4: Assign an onboarding flow to a client
When you create a new client account, you can select from any of your saved onboarding flows. This ensures that the client's account is set up with all the necessary components - from structured workouts and flexible training options to nutrition guidance and habit tracking - in one seamless process.

Benefits of using onboarding flows
- Consistency: Ensure all clients receive the same comprehensive setup based on their program type.
- Time-saving: Eliminate repetitive manual assignments for each new client.
- Flexibility: Create different flows for different client types (beginners, advanced, weight loss, muscle gain, etc.).
- Comprehensive setup: Clients get everything they need from day one - scheduled workouts, on-demand options, nutrition guidance, progress tracking, educational resources, and habit monitoring.
By creating tailored onboarding flows, you can streamline your client setup process while ensuring each person receives a complete, personalized fitness program from the start.