Creating a check-in form template is a straightforward process that allows you to gather essential information from your clients efficiently. This guide will walk you through the steps to create and customize a check-in form template.
Step 1: Navigate to the Forms Page
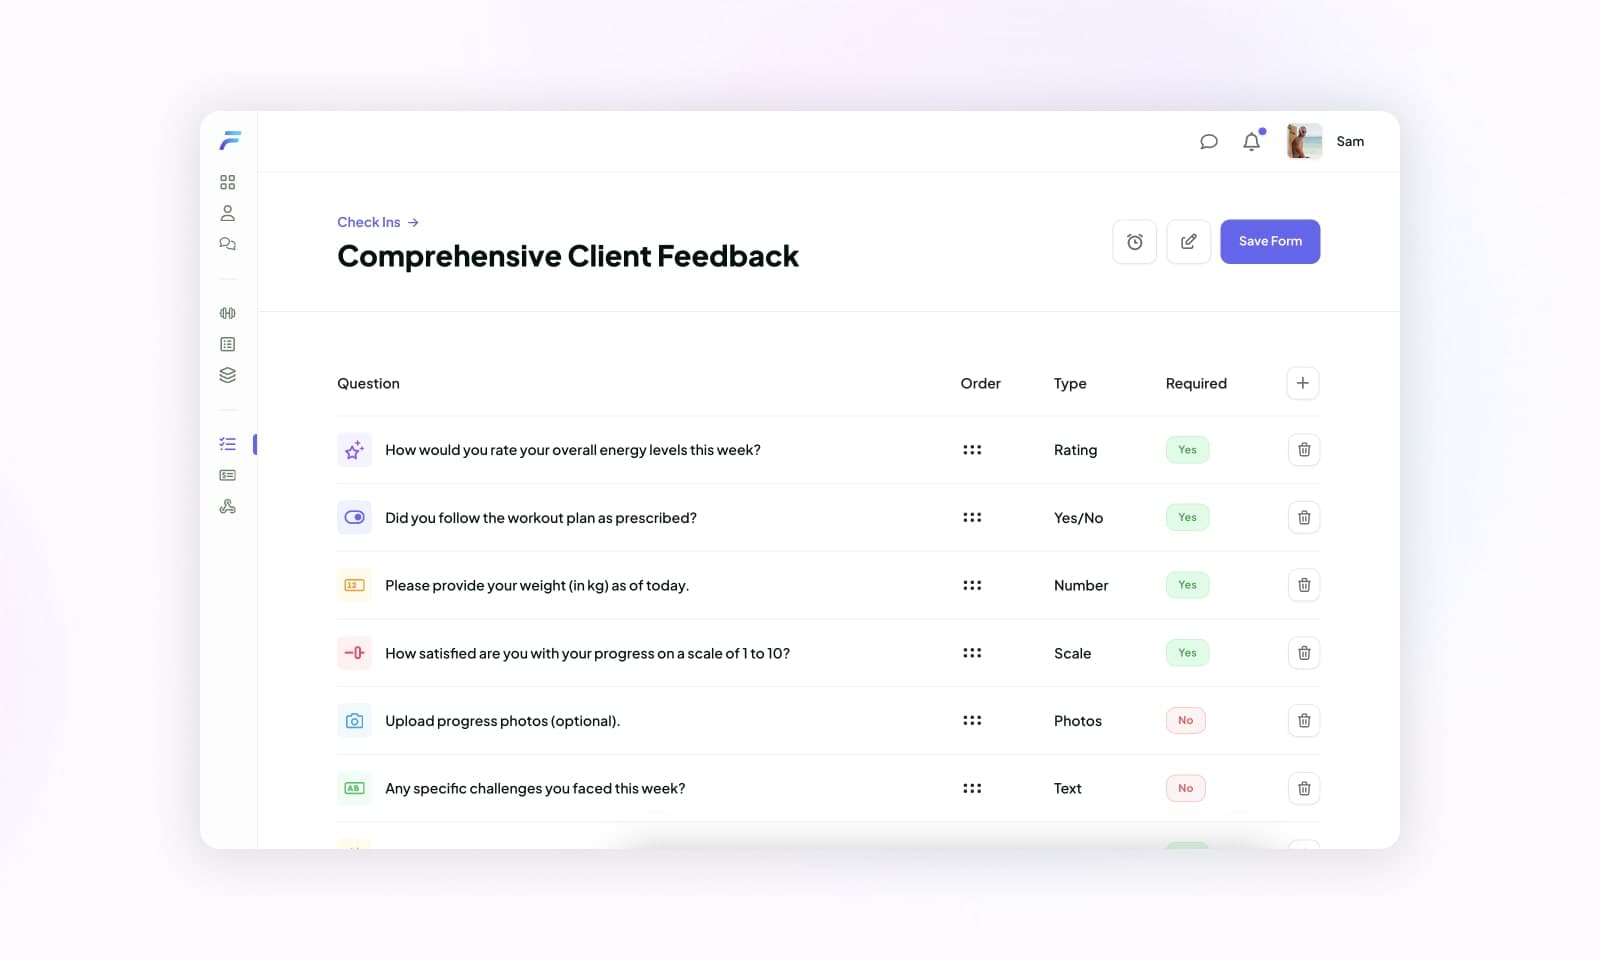
Start by heading to the Forms tab/page. Here, you'll see a list of your existing check-in forms. Each form entry displays:
- Form Name: The title of the form.
- Number of Questions: How many questions the form contains.
- Schedule: The days and time when the form is scheduled to be completed.

From this page, you can also delete any forms you no longer need.
Step 2: Add a New Form
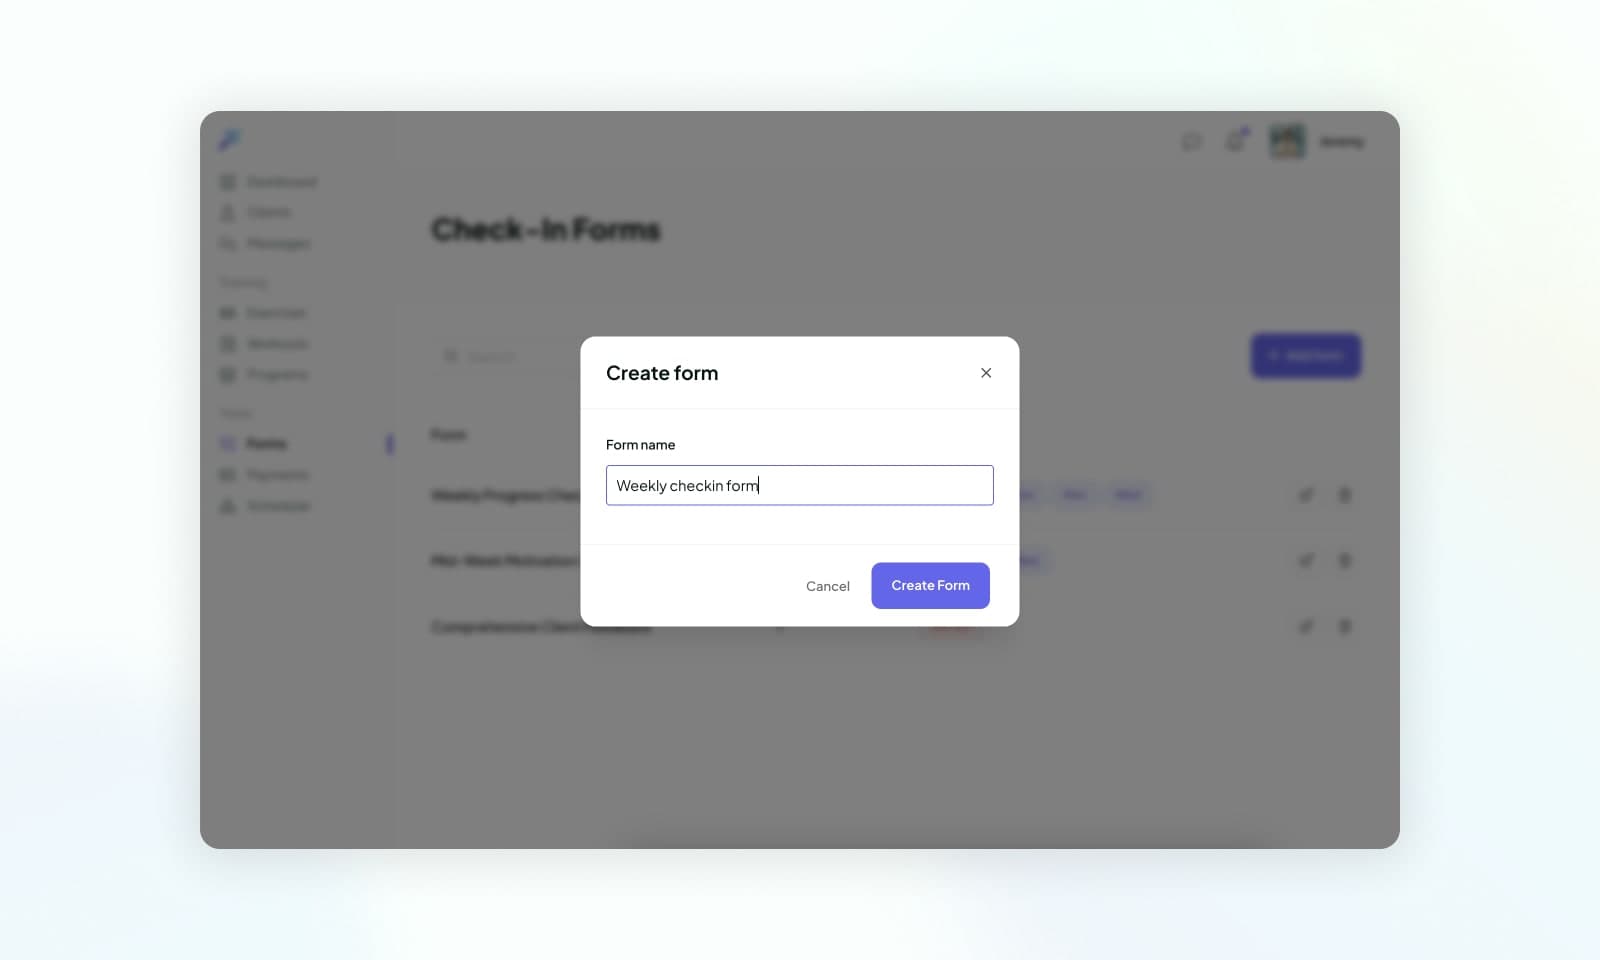
To create a new form, click the Add Form button. You'll be prompted to enter a name for your form. Once you've named your form, hit Submit to create it.

Step 3: Add Questions to Your Form
Now that your form is created, you can start adding questions:
- Click the Plus (+) icon to add a new question.
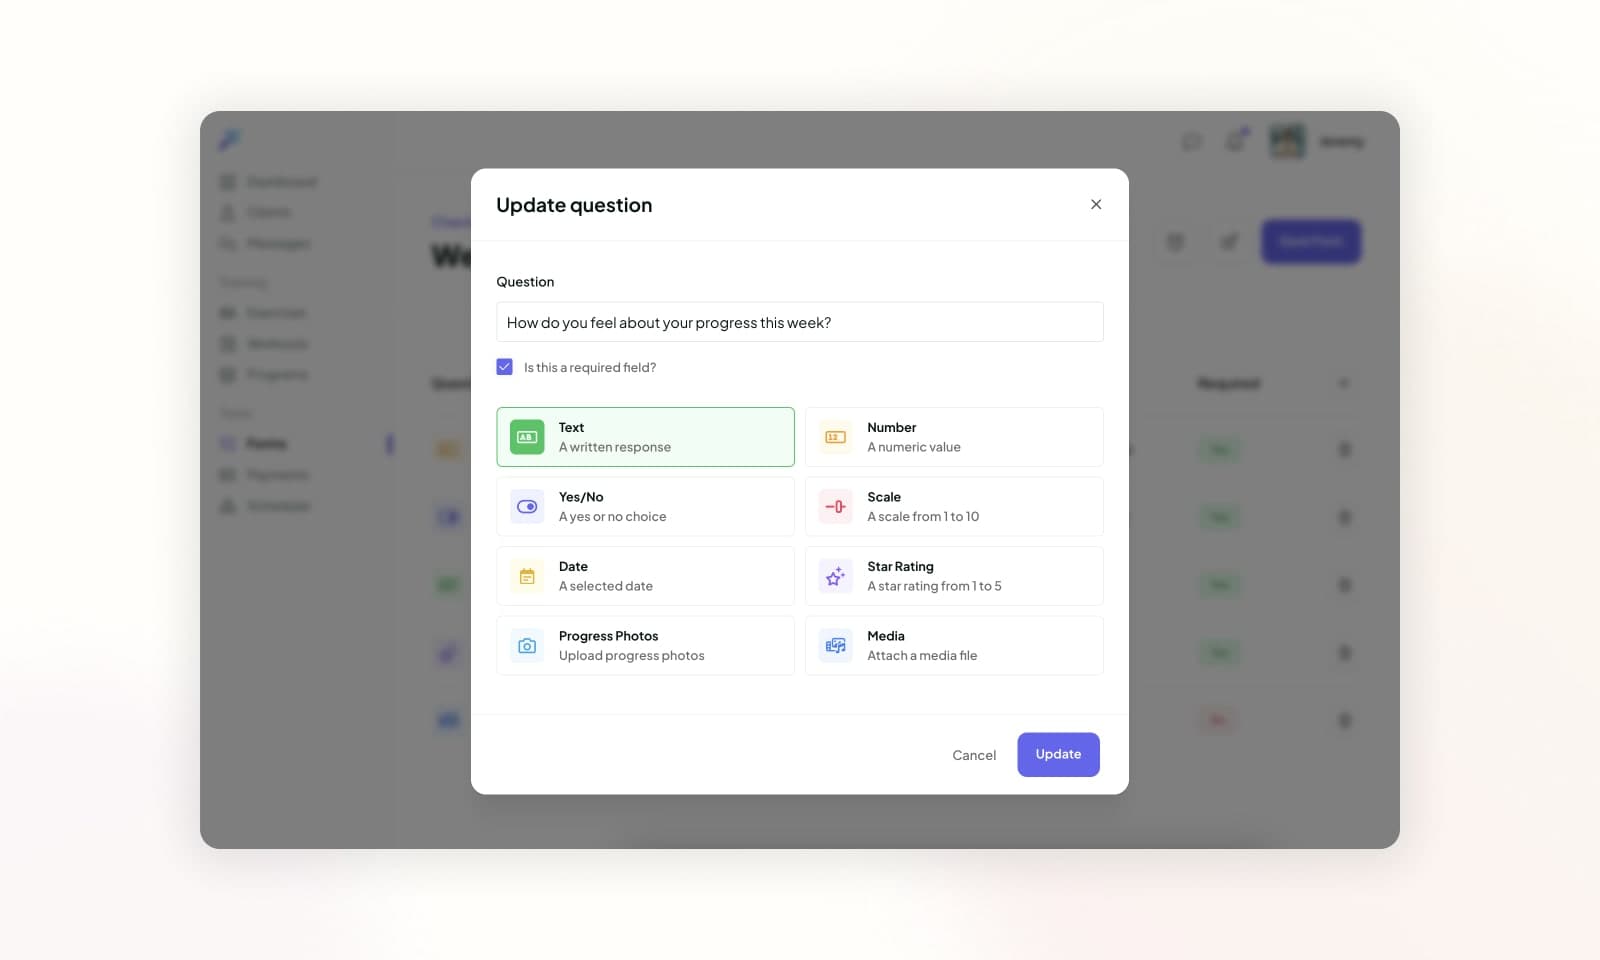
- Enter your question text in the provided field.
- Decide whether the question is Required by checking the corresponding box. Required fields must be filled out by the client.
- Select the Question Type from the dropdown menu (e.g., text, multiple choice, etc.).
- Click Add Question to include it in your form.
Repeat these steps for each question you want to add.

Step 4: Reorder and Edit Questions
Your questions will appear in a list beneath the form. You can reorder them by dragging the Drag icon to move the questions into your desired sequence.
If you need to edit a question, simply click on it to bring up the editing popup, where you can adjust the text, question type, and required status.

Step 5: Schedule the Form
To set up a schedule for your form:
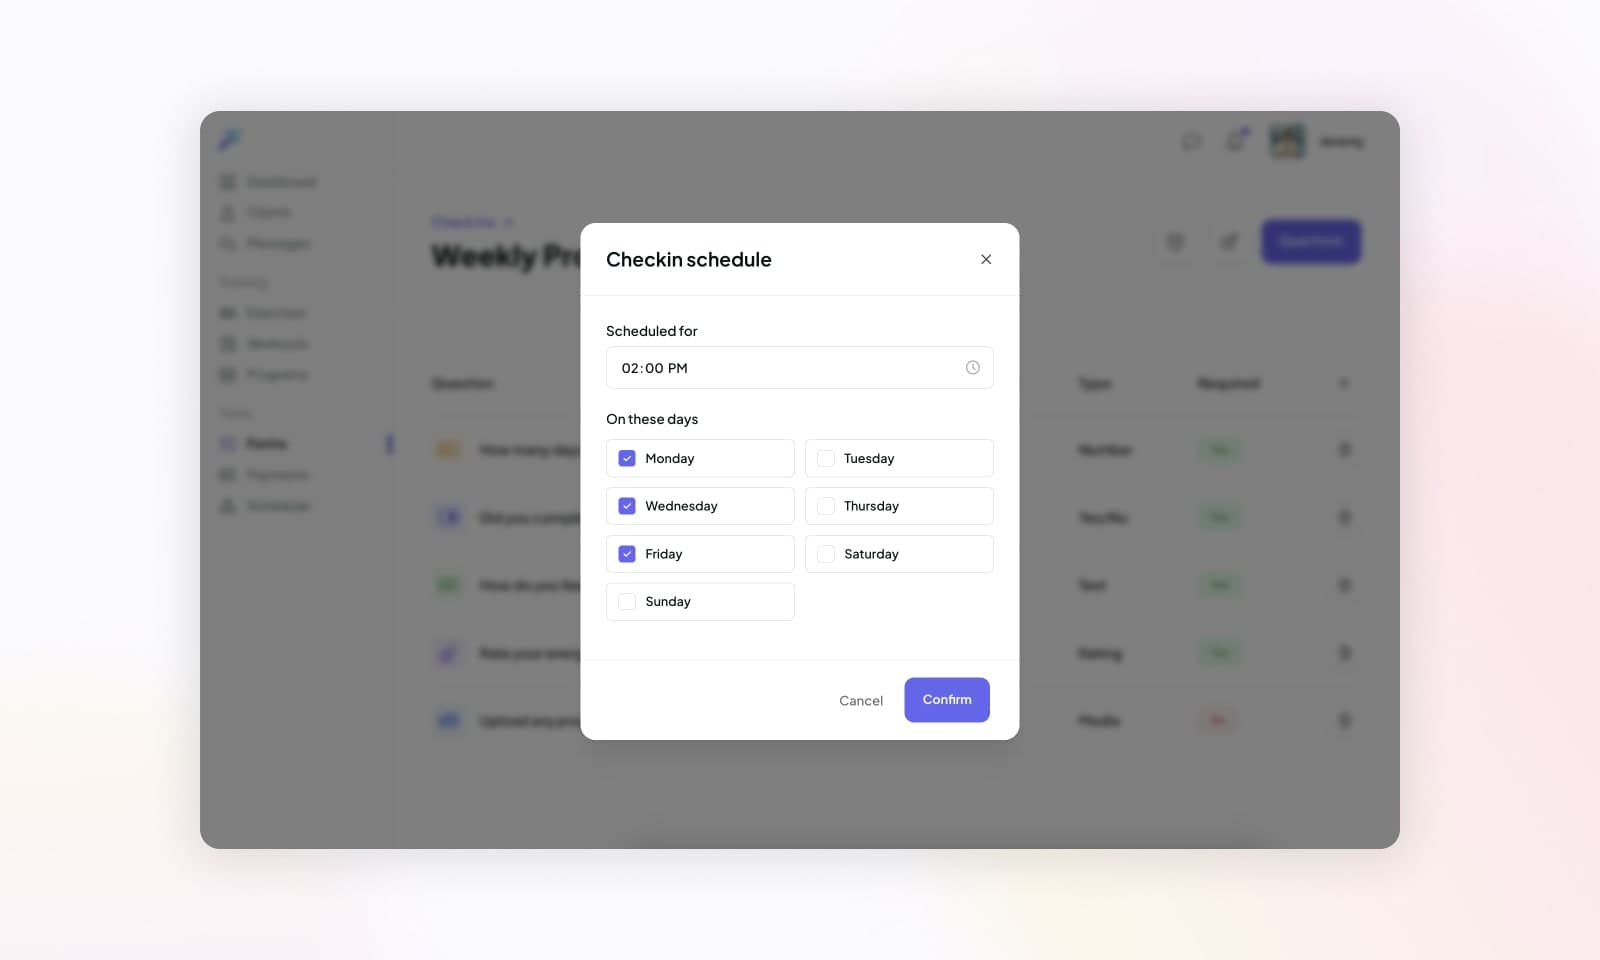
- Click the Timer icon at the top of the page.
- Select the days of the week (Monday-Sunday) when you'd like the form to be completed by your clients.
- Set a Time for the form to be completed. This is when a push notification will be sent to your client, reminding them to fill out the form. The notification will be sent at the time you select, based on the clients timezone.

Step 6: Save and Assign to your Clients
Once you're satisfied with your form and its schedule, make sure to save your work. Your form is now ready to be assigned to your clients!
By following these steps, you can create and manage check-in forms that help you keep track of your clients' progress and ensure they stay on top of their goals.